
In the first article, we implemented pretty simple Telegram bot, which gathers user requests to fix something. It’s already can be used in our business while we want to post-process requests with a separate tool. But, maybe, it would be too easy for us, so we will go ahead.
Application Requirements
In this article we will add next features to our bot:
- initial authentication of our repairers
- requests broadcasting to our repairers
- request assignment to the repairer
Telegram Bot Deeplinking
Let’s imagine that we have some separate administrative tool for our bot. And there we defined several unique IDs and assigned them to our employees/friends ( friends-employees? Why not). And now we need to authenticate them in our bot, so we can send them fix requests from our customers. We can use deep linking from Telegram to solve this task.
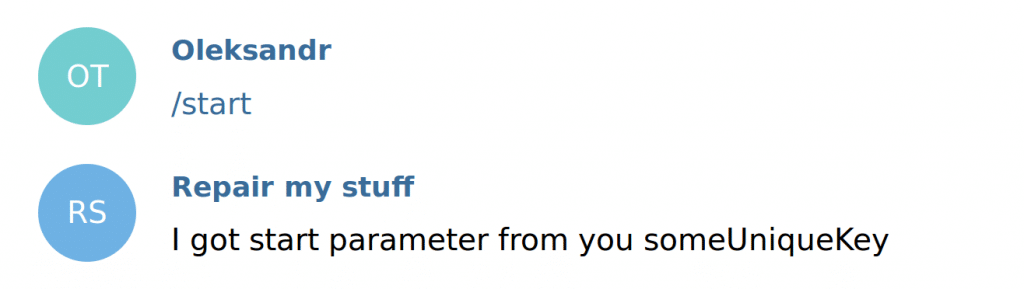
In simple words: we will provide our repairers with a link to the bot which already contains some unique ID so we can identify each separate user. Let’s try this with simple start command which will return us our unique id.
//src/command/start.js
'use strict';

import log from 'npmlog';

export default class Start {
    handle(message, bot) {
        return bot.sendMessage(message.from, `I got start parameter from you ${message.option}`);
    }
}
And updated command router bellow:
//src/command/index.js
'use strict';

import log from 'npmlog';
import FixRequest from './fixRequest';
import Help from './help';
import MyRequests from './myRequests';
import Start from './start';

const DEFAULT_HANDLER_KEY = 'help';

export default class HandlerRouter {
    constructor() {
        this.handlers = {
            'help': new Help(),
            'fix': new FixRequest(),
            'myrequests': new MyRequests(),
            'start': new Start()
        }
    }
    getCommandHandler(message) {
        let command = message.command;
        log.verbose('Handler', `Looking for the handler for command ${command}`);
        if (command.indexOf('/') == 0) {
            command = command.substr(1);
        }
        return this.handlers[command] || this.handlers[DEFAULT_HANDLER_KEY];
    }
}
To be able to communicate to our bot, in the root of our project directory, we start our nodejs application with the command:
NODE_ENV=development TELEGRAM_TOKEN=YOUR_TOKEN npm start
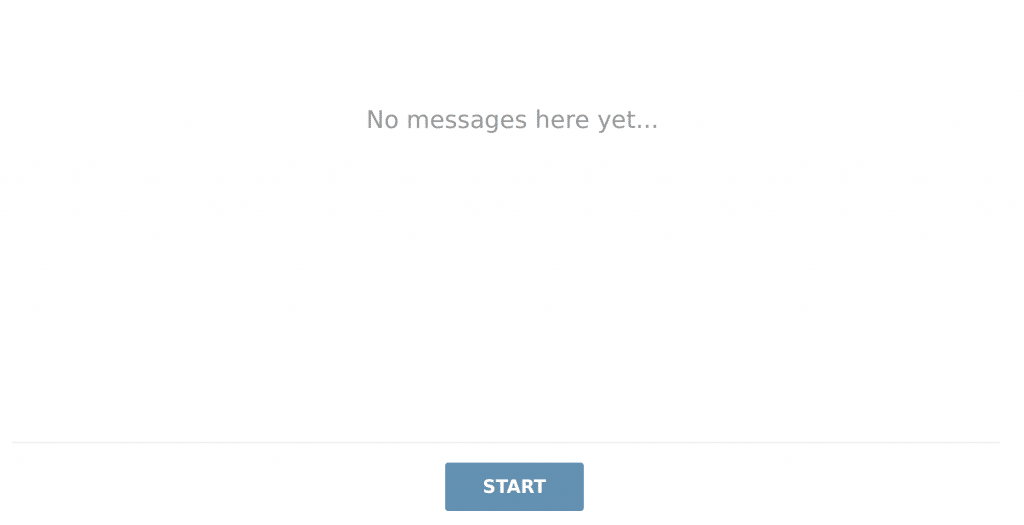
If now we open link http://telegram.me/repairMyStuffBot?start=someUniqueKey (do not forget to replace bot name) we will see chat with our bot and button start:
After clicking on start:
Seems to work as expected. We do not have that admin tool and we still need some content for testing. Let’s add database seeding for our MongoDB. Database seeding is the initial seeding of a database with data – surprised, huh?
First, we will adjust config.
//src/config/index.js
'use strict';

import _ from 'lodash';

const all = {
    telegram: {
        token: process.env.TELEGRAM_TOKEN || '',
        externalUrl: process.env.EXTERNAL_URL || '',
        port: process.env.PORT || 443,
        host: '0.0.0.0'
    },
    logLevel: 'verbose'
};
const envs = {
    'production': {
        logLevel: 'info',
        mongo: {
            uri:  process.env.MONGODB_URI ||
                process.env.MONGOHQ_URL ||
                process.env.OPENSHIFT_MONGODB_DB_URL +
                process.env.OPENSHIFT_APP_NAME,
            seedDB: false
        }
    },
    'development': {
        logLevel: 'verbose',
        mongo: {
            uri: 'mongodb://localhost/repairmystuff',
            seedDB: true
        }
    }
};
export default _.merge(all, envs[process.env.NODE_ENV]);
In this code snippet, we added extra field seedDB – we will seed DB only in development mode (we do not wanna to overwrite this collection on Production instance, right?).
Next, we want to work on the new model for our users.
//src/services/user/user.model.js
'use strict';

import mongoose from 'mongoose';

const UserSchema = new mongoose.Schema({
    startId: String,
    type: {
        type: String,
        enum : ['REGULAR','REPAIRER'],
        default : 'REGULAR'
    },
    userId: String
});
export default mongoose.model('User', UserSchema);
The Model contains only 3 fields (ok, actually it’s 4, but we do not define _id field explicitly):
- startId – unique id for user authentication
- userID – associated telegram userId with id above
- type – can have one of 2 values: REGULAR and REPAIRER. Each value will be used for a separate group of the users. Users which got link with correct start ID will get REPAIRER value, all others – REGULAR
And now, finally, seeding code:
//src/config/seeddb.js
'use strict';
import User from '../services/user/user.model'
export default class SeedDb {
static seed() {
return User.find({}).remove()
.then(()=> {
User.create({
startId: 'repairer1',
type: 'REPAIRER'
}, {
startId: 'repairer2',
type: 'REPAIRER'
}, {
startId: 'repairer3',
type: 'REPAIRER'
})
})
.then(() => {
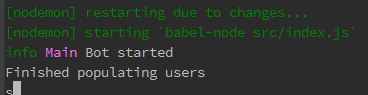
console.log('Finished populating users');
});
}
}
Here we remove all items in users collection and insert several predefined repairers. So seeding is here, the model is here, but how about execute it? Let’s navigate to our index.js:
//src/index.js
'use strict';

import log from 'npmlog';
import mongoose from 'mongoose';
import Promise from 'bluebird';
import config from './config'
import Messenger from './lib/messenger';
import SeedDB from './config/seeddb';

mongoose.connect(config.mongo.uri);
mongoose.connection.on('error', function(err) {
    log.error('Main', 'MongoDB connection error: ' + err);
    process.exit(-1);
});
mongoose.Promise = Promise;
if (config.mongo.seedDB) {
	SeedDB.seed()
}

log.level = config.logLevel;

const telegram = new Messenger();
telegram.listen().then(() => log.info('Main', 'Bot started'));
Nothing special here – we just execute seed method if seeding is enabled. Let’s run our application and check results.
TELEGRAM_TOKEN=YOUR_TOKEN NODE_ENV=development npm start
Console output:
And now check MongoDB:

We are done with database seeding.
User DAO
At this point, you have your mongoose scheme for User implemented and we can go ahead just with it. But the title of this section says User DAO! Why do we need dao? If it is implemented in a good way, we can suffer much less in case of persistence storage changes (and trust me, we will have this change =) )
//src/command/start.js:5
'use strict';

import log from 'npmlog';
import User from './user.model';

export default class UserDao {
    findRepairerByStartId(startId) {
        log.verbose('UserRepository', `Searching for repairer with start id ${startId}`);
        return User.findOne({'startId' : startId, 'type' : 'REPAIRER'});
    }

    save(user) {
        log.verbose('UserRepository', `Saving user ${JSON.stringify(user)} `);
        return user.save();
    }
}
For now, it will have 2 methods only. First method is for getting repairer by ID. Second – just for saving user.
So we are ready to use the power of deep linking. It’s time to rewrite start command.
//src/command/start.js
'use strict';
import log from 'npmlog';
import UserRepository from '../services/user/user.dao';
function sendSimpleUserResponse(userId, bot) {
return bot.sendMessage(userId, 'Hello. I can help you to fix your broken stuff. Write /help to know more.');
}
function sendRepairerUserResponse(userId, bot) {
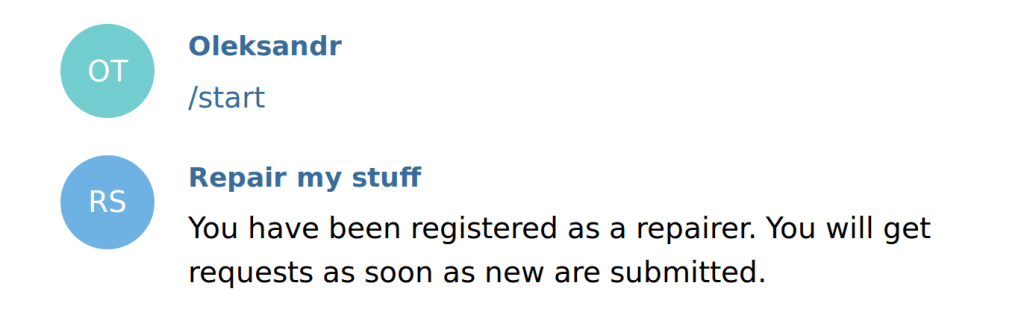
return bot.sendMessage(userId, 'You have been registered as repairer. You will get requests as soon as new are submitted.');
}
function sendErrorResponse(userId, bot) {
return bot.sendMessage(userId, 'Startup parameters were not recognized.');
}
export default class Start {
constructor() {
this.userDao = new UserRepository();
}
handle(message, bot) {
const userId = message.from;
const startId = message.option;
log.verbose('Start', `Got start command with startId '${startId}'`);
if (!startId) {
return sendSimpleUserResponse(userId, bot);
}
return this.userDao.findRepairerByStartId(startId)
.then(user => {
if (user) {
user.userId = userId;
log.verbose('Start', `Found repairer user, will set userId for him`);
return this.userDao.save(user);
} else {
log.verbose('Start', `User not found by given id`);
throw new Error('User not found');
}
})
.then(() => {
return sendRepairerUserResponse(userId, bot);
})
.catch((error) => {
return sendErrorResponse(userId, bot);
})
}
}
Now if we open link with id from our database we will be registered as a repairer. You can access it with a link telegram.me/YourBotName?start=repairer1
And in MongoDB, we can see that userId has been assigned to the user entry.

Broadcasting messages
Now, with recognized repairers, we will need to broadcast user requests in order to notify them.
Let’s first rearrange some files:
- new folder src/command/request
- fixRequest.js → new folder
- myRequests.js → new folder
- adapt src/command/index.js
We will need new method in our UserDao – method which will return all repairers.
//src/services/user/user.dao.js:9
...
findAllRegisteredRepairers() {
    log.verbose('UserRepository', `Searching for all repairers`);
    return User.find({'type' : 'REPAIRER', userId : {$ne : null}});
}
...
Here we search for our menders who has not null userId field (so user already got a link and started a chat with our bot). And we are ready to implement broadcasting itself.
//src/command/request/fixRequest.broadcast.js
'use strict';

import log from 'npmlog';
import UserRepository from '../../services/user/user.dao';

export default class FixRequestBroadcastHandler {

    constructor() {
        this.userDao = new UserRepository();
    }

    handle(fixRequest, bot) {
        return this.userDao.findAllRegisteredRepairers()
            .then(repairers => {
                repairers.forEach(repairer => {
                    log.verbose('FixRequestBroadcastHandler', `Send request to user ${JSON.stringify(fixRequest)}`);
                    return bot.sendMessage(repairer.userId, `New request: ${fixRequest.request}`)
                })
            })
            .catch(err => {
                log.error('FixRequestBroadcastHandler', `Was not able to broadcast fix request ${JSON.stringify(fixRequest)} because of ${JSON.stringify(err)}`);
            });
    }
}
In this code snippet, we’re doing next: first, we find all registered menders and then we send given request to each of them.This command is not a standalone command, but will be triggered from the FixRequest. So we need update it as well.
//src/command/request/fixRequest.js
'use strict';

import log from 'npmlog';
import FixRequest from '../../services/fixRequest/fixRequest.model';
import FixRequestBroadcast from './fixRequest.broadcast';

export default class FixRequestHandler {

    constructor() {
        this.broadcaster = new FixRequestBroadcast();
    }

    handle(message, bot) {
        const fixRequest = new FixRequest({
            'userId': message.from,
            'request': message.option
        });
        return fixRequest.save()
            .then(() => {
                log.verbose('FixRequest', `Saved fix request ${JSON.stringify(fixRequest)}`);
                this.broadcaster.handle(fixRequest, bot);
                return bot.sendMessage(message.from, 'Your request has been submitted. We will contact you soon.');
            })
            .catch(err => {
                log.error('FixRequest', `Was not able to save request ${JSON.stringify(fixRequest)}, got error: ${JSON.stringify(err)}}`);
                return bot.sendMessage(message.from, 'Sorry we can not accept your request. Try later.');
            });
    }
}
Now, after request is saved, we broadcast it. Let’s test it.
To do this we will perform next steps:
- register as repairer
- send fix request (yes, not really real life situation, it’s just for testing purposes).
- check message from the bot
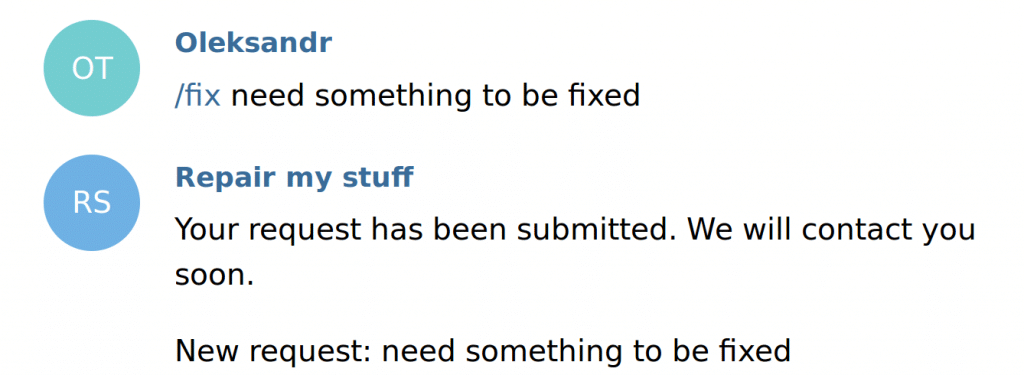
If we will stop at this point, is there anything that can go wrong? Definitely yes – 10 repairers can be interested in one request. And they do not know if somebody will arrive at the place faster. You need a mechanism of requests assignment so that our menders do not have such problems.
There are several options how to do this in telegram, but we will go with callback buttons.
Let’s check code bellow.
//src/command/request/fixRequest.broadcast.js
'use strict';

import log from 'npmlog';
import UserRepository from '../../services/user/user.dao';

function getAssignRequestKeyboard(requestId) {
    return {
        reply_markup: JSON.stringify({
            inline_keyboard: [
                [
                    { text: 'Assign to me', callback_data: `assignRequest_${requestId}` }
                ]
            ]
        })
    };
}
export default class FixRequestBroadcastHandler {

    constructor() {
        this.userDao = new UserRepository();
    }

    handle(fixRequest, bot) {
        return this.userDao.findAllRegisteredRepairers()
            .then(repairers => {
                repairers.forEach(repairer => {
                    log.verbose('FixRequestBroadcastHandler', `Send request to user ${JSON.stringify(fixRequest)}`);
                    bot.sendMessage(repairer.userId, `New request: ${fixRequest.request}`, getAssignRequestKeyboard(fixRequest._id))
                })
            })
            .catch(err => {
                log.error('FixRequestBroadcastHandler', `Was not able to broadcast fix request ${JSON.stringify(fixRequest)} because of ${JSON.stringify(err)}`);
            });
    }
}
Method sendMessage can accept the third parameter as reply options. And one of the options may be inline_keyboard – 2-dimensional array. First dimension is rows and 2nd – columns.
In our case it’s only one button, so we do not care about this. What we care about is callback_data. It consists of 2 parts:
- prefix ‘assignRequest_’ which will be used, to route user response to correct handler, which we will implement next
- requestId – to determine which request should be assigned to the repairer, who will press the button.
So, when method handle is called we send this request to all repairers and also show button with text “Assign to me”. When repairer clicks on it – request id with prefix assignRequest_ will be sent back to the bot.
For testing, we will use the same (repairer) account for submitting a request and applying on it.

Now we have button, but it does nothing, because we do not handle button click. For handling callback query messages (messages, our bot gets when user clicks on such buttons) we need to wrap it into our dto:
//src/lib/callbackQueryMessage.js
export default class CallbackQueryMessage {

  static from(telegramMessage) {
    return {
      from: telegramMessage.from.id,
      data: telegramMessage.data
    }
  }
}
Nothing special here, so we will implement handler for such messages now.
//src/command/request/assignRequest.js
'use strict';

import FixRequest from '../../services/fixRequest/fixRequest.model';

export default class AssignRequestHandler {
  handleCallbackQuery(message, bot) {

    const requestId = message.data.split('_')[1];

    return FixRequest.findById(requestId)
      .then(result => {
        if (!result) {
          return bot.sendMessage(message.from, 'Sorry but we found no such request.');
        }
        if (result.repairer) {
          return bot.sendMessage(message.from, 'Request already assigned to another repairer.');
        }
        result.repairer = message.from;
	    result.status = 'ASSIGNED';

        return result.save()
          .then(() => {
            return bot.sendMessage(message.from, 'Request has been assigned to you. Hurry up, somebody is waiting for the hero.');
          });
      });
  }
}
Callback query handler has a different contract – instead of implementing handle method, it implements handleCallbackQuery.
Let’s go through the code:
- we get request id from the message. As long as message data contains current handler’s key – we need to remove it
- Then check if such request exists and is not assigned to another repairer. Then assign it.
- After changes are saved – notify repairer about this
In real life application, we would need to add more checks here (like if current user is a real repairer), but for the sake of simplicity we skipped it.
We are almost done here. Let’s check src/lib/messenger.js . Here we handle only “text” events. Now we need to handle callback queries as well. To do this, we need to add one row right after the text handling:
this.bot.on('callback_query', this.handleCallbackQuery.bind(this));
And new method:
handleCallbackQuery(msg) {
  const message = CallbackQueryMessage.from(msg);
  handlerRouter.getCallbackQueryHandler(message)
    .handleCallbackQuery(message, this.botWrapper)
    .catch(err => {
      log.error('Messenger', `Got error from callback query handler: ${err}`);
    });
}
Also, do not forget to add import for CallbackQueryMessage. And, finally, let’s add mapping to the router of our handlers:
//src/command/index.js
'use strict';

import log from 'npmlog';

import FixRequest from './request/fixRequest';
import Help from './help';
import MyRequests from './request/myRequests';
import Start from './start';
import AssignRequest from './request/assignRequest';

const DEFAULT_HANDLER_KEY = 'help';
export default class HandlerRouter {

  constructor() {
    this.handlers = {
      'help': new Help(),
      'fix': new FixRequest(),
      'myrequests': new MyRequests(),
      'start': new Start()
    };

    this.callbackQueryHandlers = {
      'assignRequest': new AssignRequest()
    }
  }

  getCommandHandler(message) {
    let command = message.command;
    log.verbose('HandlerRouter', `Looking for the handler for command ${command}`);

    if (command.indexOf('/') == 0) {
      command = command.substr(1);
    }
    return this.handlers[command] || this.handlers[DEFAULT_HANDLER_KEY];
  }

  getCallbackQueryHandler(message) {
    let key = message.data;
    log.verbose('HandlerRouter', `Looking for the callback query handler with key ${key}`);

    if (key.indexOf('_') > -1) {
      key = key.substr(0, key.indexOf('_'));
    }
    return this.callbackQueryHandlers[key];
  }
}
We created another dictionary here for callback query handlers and separate method to get such handlers. And again, message data contains handler key as a prefix, so we need to get it from the data.
Let’s do final checks of what we have done – authenticate yourself as a repairer, and submit request. After you clicked on the button “Assign to me” you should see message:

And let’s check MongoDB:
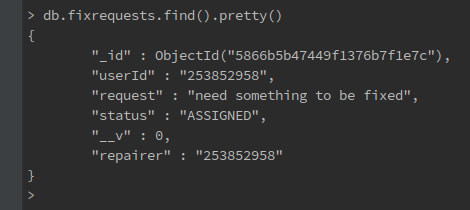
We can see that request is assigned to the repairer.
Conclusion
So now have bot with pretty handy functionality. In the article, we learned some new features which are provided by Telegram API, like deep linking and callback buttons. In the next article we will add some humanity to it.
P.S.: will be happy to get questions from you and see you soon.
You can find the complete code in this GitHub repo.
One thought on “Bot Dev: Write a stateful Telegram bot – Part 2”