
Why do we need all these bots? Why people are talking about them so much? What the bot is good for? Look around, it’s 2017 outside and nobody uses phones for calls only. Even more: today a lot of people prefer chatting to calling somebody.
But, you are still forced to make calls to get a taxi or to understand why your LAN connection is down (oh man, you again forgot to pay for it!). How often are you listening to the music, when you are on hold, instead of doing real business? That’s fine when it’s Bach, but what if it’s Justin Bieber instead? They are just wasting your time!
Chat is a better medium for a lot of people. But, yeah, you still will wait until there is a free person to respond you. Ok, finally somebody responded to you, but what if that person is in bad mood? So it still looks too unreliable and complicated. That is where bots come into play.
What We’ll Be Building
In this series of articles, we will be exploring the world of chatbots. In particular, we will build an app which allows end users to submit requests for fixing their stuff. We will call this application FixMyStuff and we are starting with implementing bot. For development, we will use npm, Node.js, Babel (as ES6 transpiler), MongoDB as data storage and some libs. This tutorial assumes at least some prior knowledge of Node.js and MongoDB. If you are new to them, you better go through some tutorial for beginner.
Application Requirements
As first steps we are going to have next:
-
Telegram bot
-
Bot’s backend part written in Node.js with MongoDB
-
End users are able to submit their fix requests
-
Users are able to check their requests and their status
Telegram Bot
Even though Telegram is not that popular as facebook messenger (especially in the USA and Western Europe) I’ve decided to start with it. Why? Just because I am using it.
What should we start with? Obviously, creating the bot and getting it’s token so we can rule it. This step is pretty easy:
-
go to https://telegram.me/BotFather – telegram’s bot for creating bots
-
type /newbot
-
BotFather will guide you through the steps. Generally, it will look like this:
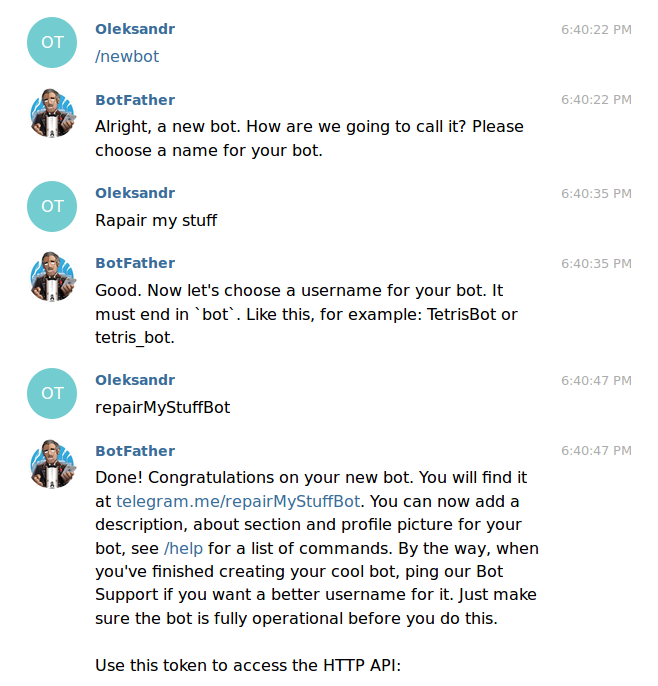
Bellow last message you will find your token. Let’s create our project dir.
mkdir repair-my-stuff && cd repair-my-stuff
The next step is to initialize our Node.js project. npm init and go through steps (usually default values are ok for us). Now let’s add some dependencies we need. That is how you package.json should look like (ok, you can change ‘author’ field to your name).
{
 "name": "fix-my-stuff",
  "version": "1.0.0",
  "description": "Simple chatbot for requesting repair of some stuff",
  "main": "src/index.js",
  "scripts": {
    "start": "NODE_ENV=development nodemon src/index.js --exec babel-node"
  },
  "dependencies": {
    "lodash": "^4.16.4",
    "mongoose": "^4.5.9",
    "node-telegram-bot-api": "^0.23.3",
    "npmlog": "^4.0.0"
  },
  "devDependencies": {
    "babel-cli": "^6.10.1",
    "babel-core": "6.10.4",
    "babel-polyfill": "^6.0.16",
    "babel-preset-es2015": "6.9.0",
    "babel-preset-stage-2": "^6.5.0",
    "babel-register": "^6.9.0",
    "nodemon": "^1.9.2"
  },
  "author": "Oleksandr Tarasenko",
  "license": "ISC"
}
Currently, it’s enough to have there only one script – start. There we set environment mode and run nodemon with preprocessing our code with babel.
Let’s quickly go through dependencies:
- lodash – contains some useful methods, like object merge.
- mongoose – ORM for MongoDB
- node-telegram-bot-api – library which wraps Telegram API into a nice set of methods
- npmlog – lib for logging our messages. This will make our life easier
- babel-* – we are going to write our project in ES6 and for this we will use transpiler (es6 is supported on 99% by latest nodejs versions, but we can be not aware of nodejs version we will run our app on in production, so we will keep it safe)
- nodemon – lib for restarting our project on code change
Now we should install dependencies:
npm install
For babel we need to enable presets. That is why we create .babelrc file next to package json. This is its content:
{
  "presets": ["es2015"]
}
Starting from babel 6, if you have no presets enabled, your code will be just parsed and generated again (unchanged). But we are writing in ECMAScript 2015 and want to transpile it to ES5. And yes, for using babel in our start script (where we use command line interface), we should install babel cli globally
npm install --global babel-cli
App Setup
Here’s our file structure:
repair-my-stuff/
├── src
│   ├── command <!--there we have our commands -->
│   │   ├── fixRequest.js
│   │   ├── help.js
│   │   ├── index.js
│   │   └── myRequests.js
│   ├── config <!--there we store configuration of our app -->
│   │   └── index.js
│   ├── index.js <!--main script-->
│   ├── lib <!--there we will put what is related to Telegram →
│   │   ├── fixMyStuffBot.js
│   │   ├── message.js
│   │   └── messenger.js
│   └── services <!--our services or telegram independent logic-->
│       └── fixRequest
│           └── fixRequest.model.js
├── package.json
└── .babelrc
As you can see, we put Telegram specific logic into the separate folder. Thought out this article, you will see that I am willing to reach a higher level of abstraction. In case you wanna to reuse existing logic with another bot (and I will cover this in one of next articles), you should keep bot-related logic away from your business logic.
Now let’s get closer to our code. First, we will look into our main script:
//src/index.js
'use strict';
import log from 'npmlog';
import mongoose from 'mongoose';
import Promise from 'bluebird';

import config from './config'
import Messenger from './lib/messenger';

mongoose.connect(config.mongo.uri);
mongoose.connection.on('error', function(err) {
    log.error('Main', 'MongoDB connection error: ' + err);
    process.exit(-1);
});
mongoose.Promise = Promise;

log.level = config.logLevel;

const telegram = new Messenger();
telegram.listen().then(() => log.info('Main', 'Bot started'));
There we establish a connection to MongoDB with mongoose, force mongoose to use bluebird promises and set log level for npmlog. Then we create an instance of our Bot and start it.
Before going to the logic of our bot, let’s check our configuration:
//src/config/index.js
'use strict';
import _ from 'lodash';
const all = {
    telegram: {
        token: process.env.TELEGRAM_TOKEN || '',
        externalUrl: process.env.EXTERNAL_URL || '',
        port: process.env.PORT || 443,
        host: '0.0.0.0'
    },
    logLevel: 'verbose'
};
const envs = {
    'production': {
        logLevel: 'info',
        mongo: {
            uri:  process.env.MONGODB_URI ||
                process.env.MONGOHQ_URL ||
                process.env.OPENSHIFT_MONGODB_DB_URL +
                process.env.OPENSHIFT_APP_NAME
        }
    },
    'development': {
        logLevel: 'verbose',
        mongo: {
            uri: 'mongodb://localhost/repairmystuff'
        }
    }
};
export default _.merge(all, envs[process.env.NODE_ENV]);
So there we have the configuration, which is common for all environments and several specific – development and production. At the end we merge common and current environment configurations. Telegram specific properties we will discuss later on. For now, we are interested in envs.development.mongo.uri. You should change it to match your local MongoDB instance (usually it’s the same).
Bot brains
We are ready to look into our bot’s brains:
//src/lib/messenger.js
'use strict';
import TelegramBot from "node-telegram-bot-api";
import config from '../config';
export default class Messenger {
    constructor() {
        if (process.env.NODE_ENV === 'production') {
            this.bot = new TelegramBot(config.telegram.token, { webHook: { port: config.telegram.port, host: config.telegram.host } });
            this.bot.setWebHook(config.telegram.externalUrl + ':443/bot' + config.telegram.token);
        } else {
            this.bot = new TelegramBot(config.telegram.token, { polling: {timeout: 10, interval: 100} });
        }
    }
    listen() {
        this.bot.on('text', this.handleText.bind(this));
        return Promise.resolve();
    }
    handleText(msg) {

    }
}
As you can see, this file is not final. In method listen, we bind method handleText to this and set it as a callback on event ‘text’. And we return resolved Promise. Nothing interesting there so far.
The constructor looks more complicated. Let’s check what we have there.There are 2 available ways of getting data (in our case – messages) from Telegram server:
- webhook – you give your url to the Telegram server, and when a new message arrives – message will be sent to you
- polling – every n seconds you make a request to the server and it responds to you with available data.
With webhook your bot will respond to users much faster but it requires SSL certificate. Polling, on the other hand – is slower (because of intervals between requests). So in our case, we use webhook for the production environment and polling – for development, because in last case we do not need it to respond fast and we are not forced to mess with SSL certificate.
It’s time to write our first command:
//src/command/help.js
'use strict';
export default class Help {
    handle(message, bot) {
        return bot.sendMessage(message.from, 'Sorry, we do not have any commands yet.');
    }
}
There we just send a message to the user, we got this command from. We do not have any commands yet (yes, except help) so we tell user about this. sendMessage is one of the base methods in the library.
Take a look at handle method’s signature. It will be our contract for all command handlers – they should implement method handle(message, bot), which returns Promise.
Route me
Next, we need somehow to transport message from the messenger to our help command.
//src/command/index.js
'use strict';
import log from 'npmlog';
import Help from './help';
export default class HandlerRouter {
    constructor() {
        this.handlers = {
            'help': new Help()
        }
    }
    getCommandHandler(message) {
        let command = message.command;
        log.verbose('Handler', `Looking for the handler for command ${command}`);
        if (command.indexOf('/') == 0) {
            command = command.substr(1);
        }
        return this.handlers[command];
    }
}
Here we create a dictionary with available commands. And method, where we remove ‘/’ from the command, getting handler from the dictionary and return it.
Now it’s a time to connect our messenger and Handler Router. First, we should wrap message object from telegram with our own object to keep external dependencies away from our logic.
//src/lib/message.js
'use strict';
export default class Message {
    static from(telegramMessage) {
        let command,
            option;
        if (telegramMessage.text.indexOf(' ') > -1) {
            const parts = telegramMessage.text.split(' ');
            command = parts.shift();
            option = parts.join(' ');
        } else {
            command = telegramMessage.text;
        }
        return {
            from: telegramMessage.from.id,
            command: command,
            option: option
        }
    }
}
Here we have one static method, where we split message on command itself and any other text which can go after it.
Let’s get back to our messenger. We should add there 2 more imports and implement method handleText.
//src/lib/messenger.js
'use strict';
import TelegramBot from "node-telegram-bot-api";
import config from '../config';
import HandlerRouter from "../command";
import Message from "./message";
const handlerRouter = new HandlerRouter();
export default class Messenger {
    constructor() {
        ...
    }
    listen() {
        ...
    }
    handleText(msg) {
        const message = Message.from(msg);
        handlerRouter.getCommandHandler(message)
            .handle(message, this.bot);
    }
}
In method handleText we wrap message, find requested command and handle the message with it.
Test it
Finally, we are ready to test our bot. Next command is used to run the project (make sure, that your MongoDB instance is up and running).
TELEGRAM_TOKEN=YOUR_TOKEN NODE_ENV=development npm start
In you logs, you should see something similar to output bellow:
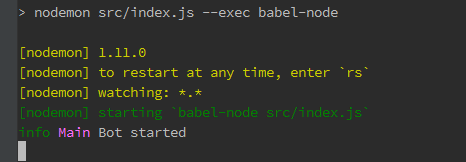
How about going to telegram to check if our bot works? Go to https://telegram.me/yourBotName. Type help and check output. I’ve got next:
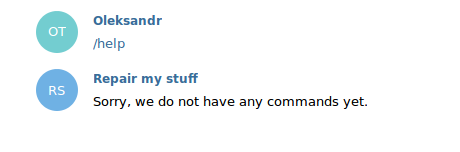
If you got no answer – check your logs.
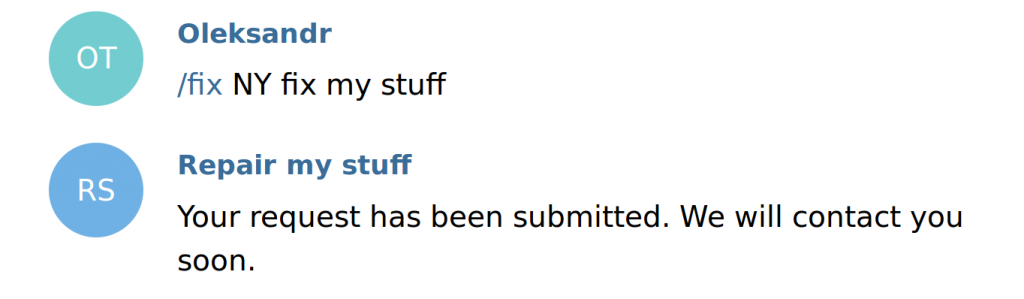
“Fix” Command
Now it’s time to create more useful command – /fix. With it the user will be able to submit his requests for fixing his broken things. First, we will try to send this command before we, actually, implement it. You will get nothing from the bot, but in logs you will see:
verb Handler Looking handler for command /fix
Unhandled rejection TypeError: Cannot read property 'handle' of undefined
Oops. Let’s check what has happened. In our HandlerRouter we return value from the dictionary. Usually, it’s handler instance, but what If there is no such handler? In such case we get undefined and, as a result, error. We need to fix it.
//src/lib/messenger.js
'use strict';
import log from 'npmlog';
import Help from './help';

const DEFAULT_HANDLER_KEY = 'help';

export default class HandlerRouter {
    constructor() {
        this.handlers = {
            'help': new Help()
        }
    }
    getCommandHandler(message) {
        let command = message.command;
        log.verbose('Handler', `Looking handler for command ${command}`);
        if (command.indexOf('/') == 0) {
            command = command.substr(1);
        }
        return this.handlers[command] || this.handlers[DEFAULT_HANDLER_KEY];
    }
}
We changed method getCommandHandler to return default handler if there is no such command. We are using Help command handler for this.
Bot abstraction
In one of the previous sections, I was talking about abstractions. And we have applied this principle in several places. But we forgot to apply this principle for Bot itself. Let’s fix it. We start with our wrapper for bot object. Here’s what the code looks like.
//src/lib/fixMyStuffBot.js
export default class TelegramBot {
    constructor (telegramBot) {
        this.bot = telegramBot;
    }
    sendMessage(userId, message, messageOptions) {
        return this.bot.sendMessage(userId, message, messageOptions);
    }
}
Currently, we just call method from API of the library we used. But in future, when you will want to adapt this code for another library(which works with, e.g. Facebook Messenger Bot API), your commands will not be affected by this change (ok, probably will be, but not that much). The biggest thing you will need to do – is to create an object with another implementation of sendMessage method.
Also here are some changes in messenger:
//src/lib/messenger.js
...
listen() {
    this.bot.on('text', this.handleText.bind(this));
    this.botWrapper = new FixMyStuffBot(this.bot);
    return Promise.resolve();
}
handleText(msg) {
    const message = Message.from(msg);
    handlerRouter.getCommandHandler(message)
        .handle(message, this.botWrapper)
        .catch(err => {
            log.error('Messenger', `Got error from command handler: ${err}`);
        });
}
...
Here we added import for our fixMyStuffBot.js, created wrapper and passed it to handleText method of our command handler.
“Fix” Command (attempt #2)
Finally, it’s time to get to really useful command – Fix Request. First, we should create model, which we will store in our MongoDB:
//src/services/fixRequest.model.js
'use strict';
import mongoose from 'mongoose';
const FixRequestSchema = new mongoose.Schema({
    userId: String,
    request: String
});
export default mongoose.model('FixRequest', FixRequestSchema);
It has 2 fields – userId and request, both are strings. Code of the command handler:
//src/command/fixRequest.js
'use strict';
import log from 'npmlog';
import FixRequest from '../services/fixRequest/fixRequest.model'
export default class FixRequestHandler {
    handle(message, bot) {
        const fixRequest = new FixRequest({
            'userId': message.from,
            'request': message.option
        });
        return fixRequest.save()
            .then(() => {
                log.verbose('FixRequest', `Saved fix request ${fixRequest}`);
                return bot.sendMessage(message.from, 'Your request has been submitted. We will contact you soon.');
            })
            .catch(err => {
                log.error('FixRequest', `Was not able to save request ${fixRequest}, got error: ${err}`);
                return bot.sendMessage(message.from, 'Sorry we do not have any commands yet.');
            });
    }
}
Here we create model, with userId from the message and with request description. Then we save this model, and if promise from mongoose resolves (so it’s saved) – we send message back to the user. If error occurs – we log this, and send error message to the user. And yes, we return promise from handle method, in case we need to do some extra steps outside of the command. After implementing command, we need to add it to our handler router src/command/index.js:
- new import import FixRequest from ‘./fixRequest’;
- constructor
constructor() {
    this.handlers = {
        'help': new Help(),
        'fix': new FixRequest()
    }
}
Also, we should update our help command:
//src/command/help.js
'use strict';
export default class Help {
    handle(message, bot) {
        return bot.sendMessage(message.from, 'Type /fix your_address_and_problem_description to submit request (e.g. /fix NY. TV got broken)');
    }
}
Let’s run our application and test it:
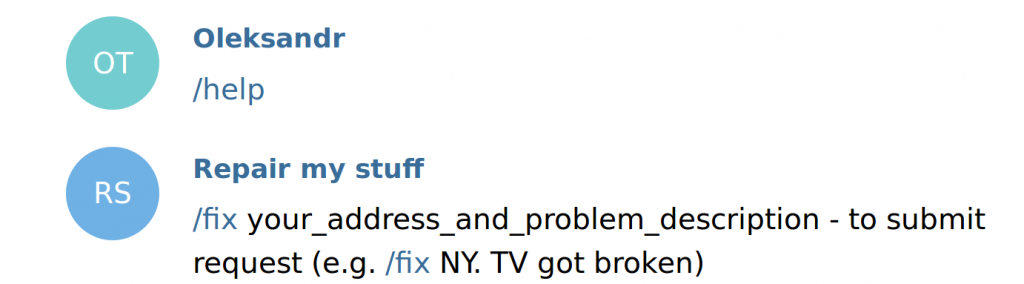
And submit new request:
Additionally, we can check if request has been saved in our DB:

So everything looks good so far.
“My requests” command
After user submitted request, he, probably, will wanna to check it’s status. Let’s give him this feature. First, we should adapt our model.
//src/services/fixRequest/fixRequest.model.js
'use strict';
import mongoose from 'mongoose';
const FixRequestSchema = new mongoose.Schema({
    userId: String,
    request: String,
    status: {
        type: String,
        enum : ['NEW','ASSIGNED', 'IN_PROGRESS', 'RESOLVED', 'DECLINED'],
        default : 'NEW'
    }
});
export default mongoose.model('FixRequest', FixRequestSchema);
Here we added status field, with enum type. Actually, it’s String type, but we provide the array of possible values, so it behaves like enum. Default value would be NEW.
Now go ahead to the command:
//src/command/myRequests.js
'use strict';
import log from 'npmlog';
import FixRequest from '../services/fixRequest/fixRequest.model'
const MESSAGE_OPTIONS = {
    parse_mode: 'Markdown'
};
function formatRequests(requests) {
    let message = 'Your requests:\n';
    requests.forEach(userRequest => {
        message += `*Request*: ${userRequest.request}\n`
        + `*Status*: ${userRequest.status}\n\n`;
    });
    return message;
}
export default class MyRequests {
    handle(message, bot) {
        const userId = message.from;
        return FixRequest.find({'userId': userId})
            .then((result) => {
                log.verbose('MyRequests', `For user ${userId} found next requests: ${JSON.stringify(result)}`);
                let message = '';
                if (result && result.length > 0) {
                    message = formatRequests(result);
                } else {
                    message = 'You have no requests yet.';
                }
                return bot.sendMessage(userId, message, MESSAGE_OPTIONS);
            })
            .catch(err => {
                log.error('MyRequests', `Was not able to find requests for user ${userId}, got error: ${err}`);
                return bot.sendMessage(userId, 'Sorry we were not able to find your requests. Try a bit later');
            });
    }
}
Let’s go through handle method:
- We search for all requests from user
- Then if there are any requests, we format them. Otherwise – we tell user, that we found no requests.
- We send message back to the user. In case of error, as usually, we log it and tell user to try later.
Method formatRequests is quite simple: we add each user request and it’s status to the message body with several line separators.
Finally, we will test this handler.
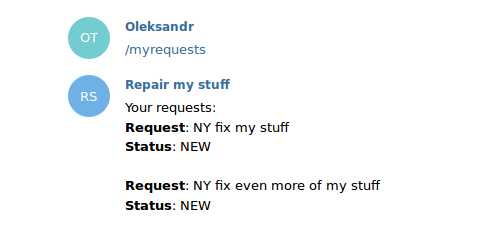
We got our requests back (output, obviously, depends on submitted requests). That is what we expected. Command seems to be finished now. The last thing would be to update help command.
Conclusion
At this point, we’ve learned some basics of chatbots. Why they are good and how to write a simple bot. For now, we have only 2 commands. Standalone they are not really useful, but we will fix this in our next topic.
You can find the complete code in this GitHub repo.
P.S.: will be happy to get questions from you and see you soon.
P.P.S.: after this article has been finished and next article was started I came across another library for creating Telegram Bot with Node.js. It has pretty nice OOB routing and some other features. So you should give it a try as well.
Nice article mate 🙂 how can I make a chain requests with states ?
Hi ALEXANDR, I am really sorry for not answering you earlier. Is the question still valid for you?